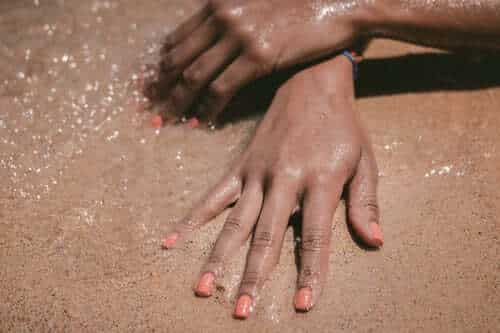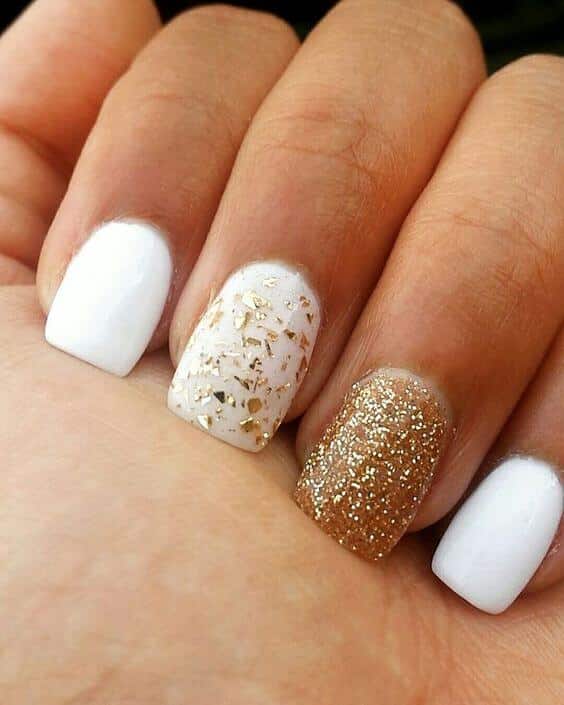
For those wondering what color to pick out at the salon for their next nail appointment think gold; specifically gold accent. Opt for a base color to match the season and let the gold be the star. Don’t be afraid to mix gold with gold, and a matte base can look real nice under shiny accents.
Since most salons will charge you for nail art it can be a smart idea to do it yourself at home. Pick a base color you want to pair your gold accent with and you can do the nail art yourself at home.
Nail art can be one of those things that look super hard, but in reality, it can be quite easy to do yourself at home.
[content-egg-block template=custom/new_list_test]Contents
Things To Keep In Mind
You are going to want to keep in mind the application needed for your gold nail color or nail art because the process can all be a bit different.
Some may be as simple as sticking it directly onto your nail and some may require some time, effort, and special product.
As a nail tech, I can tell you nail art and nail coloring is not as hard as you may think. If you have the proper tools to do the job than you can do it easily with results that last.
Investing in the proper tools and products can make a world of difference. Below is a quick list of my favorite products that can be beneficial to your nail application needs.
2-3 Week Top Coat (NO Light Needed)

This CND Vinylux does not require a UV light but works in the same manner as a no-chip top coat.
Vinylux is applied and dries the same as a standard top coat, so there is no reason not to use this!
Ideal for 1 – 2 weeks.
Best when paired with any polish but will work best with vinylux nail colors.
2-3 Week Top & Base Coat (NO Light Needed)

This OPI Infinite Shine Duo also does not require a UV light but works as a no-chip type of polish.
Ideal for 2+ weeks.
Best when paired with OPI Infinite shine color.
UV Light

My favorite lamp! It is the best becuase it has a reflective bottom base that helps cure the polish accurately and works way better than one that just has a UV light half shell with no bottom.
Lights are located all around the device and you aren’t getting just a single overhead light source like other machines.
UV Base Coat – Light Needed

My favorite No Chip base coat.
Pro Tip: You can use this base coat with any gel or no chip color. Cure OPI base coat per directions. After its cured take a small brush and lightly wipe the top. Continue to apply and cure any gel color per its own brand’s directions.
Meant to be used with the UV Nail Light.
UV Top Coat – Light Needed

My ABSOLUTE favorite top coat!
It doesn’t get sticky or junky after a few uses like other brands even if you don’t keep it in the proper storing conditions (out of sunlight and away from excessive heat or cold).
Much like the OPI base coat, this OPI top coat works great with any no-chip or gel color brand.
Meant to be used with the UV Nail Light.
Polish Drying Spray – No light needed – Pairs with any polish normal and week wear

This OPI rapidry helps nail polish not cured with a UV Light dry and cure faster.
A few sprays of this will cut the drying time in over half.
It smells good and is super light so it doesn’t leave the skin oily or irritated.
Note: there are other brands you can use, these just happen to be my favorite brands and onces that have worked well for me over other brands. I’ve tried them all!
Nail Brush

This nail brush may be the most important item you use during a manicure.
This brush is essential in cleaning up your base coat, polish and top coat. You NEVER want to polish your entire nail up to your skin or cuticle. You want a small, thin gap between the polish and the sides of your finer skin and cuticle to prevent lifting, chipping and peeling.
Having a brush with an acrylic base is going to be crucial because a standard makeup brush is typically wood and nail products can eat away at it and ruin it.
Super Adhesive Nail Gem Glue- No Light Needed


This nail gel glue is great for those who want to use 3D nail art or nail adhesives without having to use a UV light or gel polish.
Use this with normal polish or week wear polish.
This set comes with both products pictured here: a tube you can squeeze a drop directly on your nail or a container you can dip your brush in and coat the gel over the rhinestones or jewels.
Professional suggestion: use the thin glue for tiny and small gems or jewels, and use the thicker one is for the non-flatback or large gems jewels.
Now that you have my favorite products you are set up for a successful gold nail. Have it be just plish or a bit of gold nail art, these are sure to grab some attention!

For most nail art you will want to do 2 or even 3 layers of top coat over the art you put on so the nail feels smooth to the touch after it is cured. Make sure you are super clean with your application and the cleanup. I suggest taking a small brush and wiping it along the sides of your nails and the bottom part so there is a super-thin line between the nail polish layers and your cuticle. When base coat, polish or top coat touch your skin or the cuticle it causes a gap that results in lifting and chipping. Properly cured and applied gel or no chop should never lift or chip if it does the nail tech was slopping and didn’t do a proper application.
After the multiple top coats the shape should feel smooth or it will get caught on stuff and lift up. Make sure the coats are enough to make the shape smooth but not too thick by the sides of your skin or it will lift and peel. It takes practice but you’ll get it quick.
Keep in mind when I say 2 or 3 top coat layers I mean normal to thin layers, don’t take extra product and slap it on trying to make it thick. Thinner is always better when applying polish.
Gold Nail Polish
Let’s start with the basics, nail polish. Here are a few of my favorite gold nail polishes that you can wear as a stand-alone or as a base for your nail art.
Some of the nail art packs we will be going over will include other colors besides gold like white, silver or even colors that can be amazing over gold polish.
Normal Polish (No UV LIght Needed)

Glossy Shine Finish

Metallic Collection

Gold Sparkles

Gold Color Made With Vitamins

Color & Sparkles

Creamy Gold

Bigger Gold Sparkles

Gold Chameleon

Fine Gold
2 -3 Week Wear Nail Polish (NO UV Light Needed)

Honey Gold

Shimmer Gold

100 Karat Gold

Silky Gold

Rose Gold

Yellow Gold
Gel or No-chip Polish (Needs UV Light)

Light Gold

Gold Sparkles

Light Gold

Medium Gold

Deep Gold

BIg Sparkles
These polishes can be the base that can go with the rest of the nail art ideas below or you can use just use the polish to be the flair.
You can always go simple gold polish with more nail art flair or go bold with the polish and simple with the add on art.
Gold Polish Ideas


Application Tips For All Below Nail Art
All of the below gold DIY nail art is going to be stuff you can add on top of your nail, and while each pack is unique they will all be applied basically the same way.
Step 1
If you are doing any of this over gel or normal polish simply take the desired shapes with the tweezers and place on top of the send layer of colored polish.
If using normal polish let the color coats completely dry before you attach nail adhesives. Use the Super Adhesive Nail Gem Glue under where you want to attach the gems.
Step 2
If using nomral polish use the Super Adhesive Nail Gem Glue with the Nail Brush to swipe a layer over the top to keep it on. Optional but I would recommend it.
Put top coat over the design.
You will want 2-3 layers of topcoat for this nail art.
Step 3
If you are using normal or week wear polish spray the topcoat with rapid dry.
If you are using Gel or no chip cure the top coat per directions and then swipe with 100% isopropyl alcohol to get the stick off and set it.
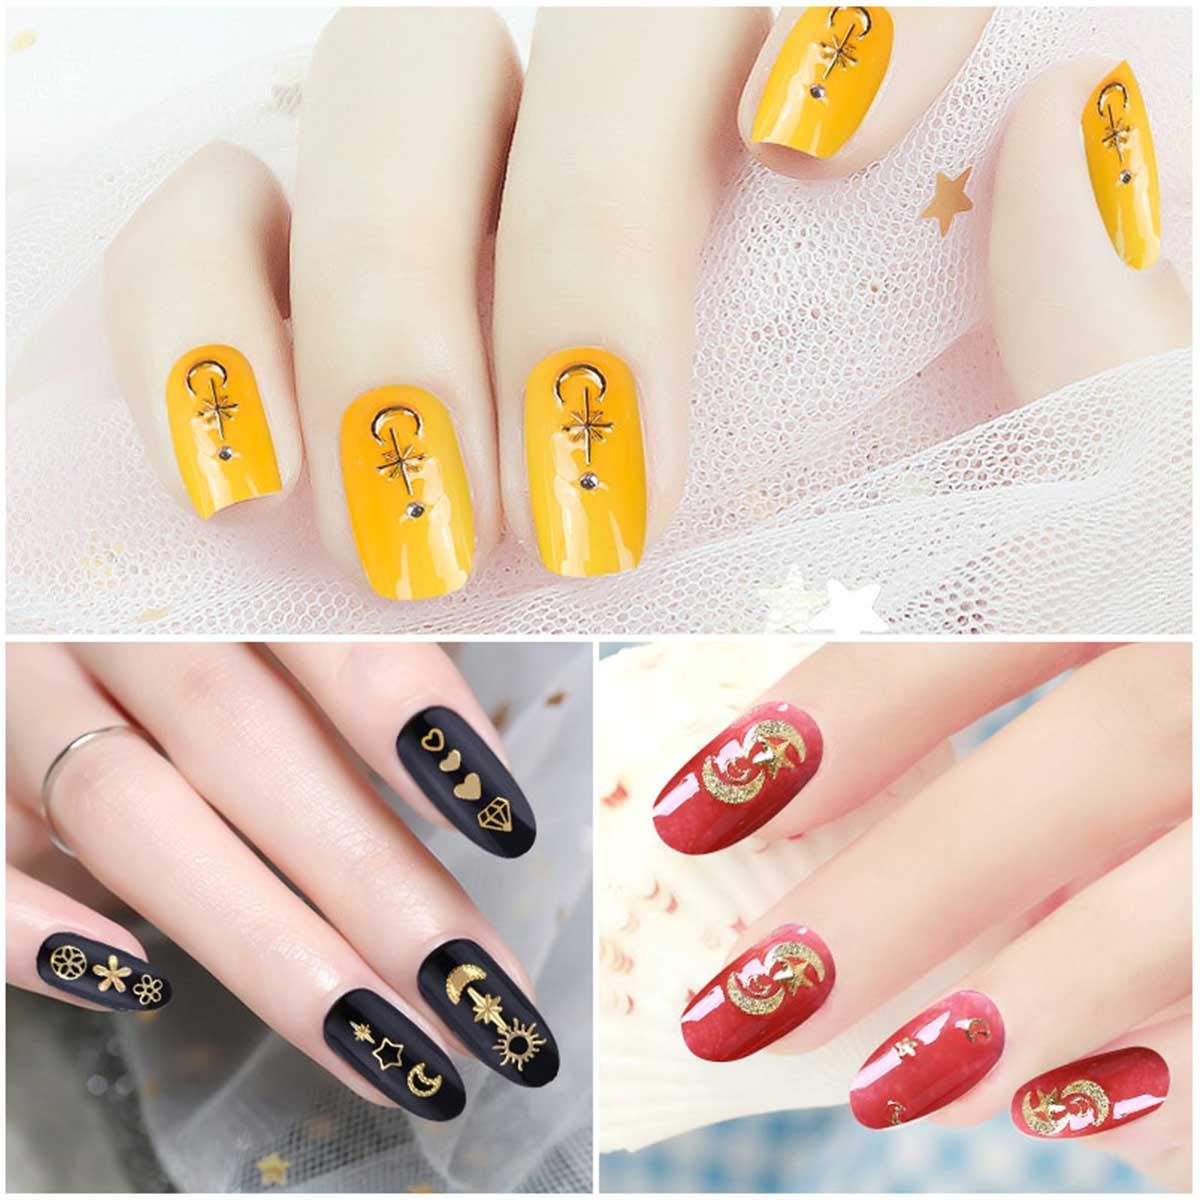
3D Metal Shapes


Into zodiac signs? Then you’re going to want to get these ASAP!
This comes in a pack of over 25 different shapes with an emphasis on moons, stars, and shapes.
This set comes in a box that keeps all the pieces organized separately and the tweezers help in taking them out of the container and putting them onto the nail.
Three different colored beads are ideal for pairing with the shapes to make unique designs.
Pros
- 3D Shape
- A large variety of pieces
- Organized case
- Comes with Tweezers
Cons
- More advanced application
- Works best with UV Light
Nail Inspo With This Pack


Nail Striping Tape – My Top Pick

Honestly, this stuff is my favorite. While this post is about gold DIY nail art, this pack comes with gold plus every other color you could want.
I used this striping tape the most on all my clients and I never ONCE had anyone complain about the final result. In fact, once I used it on clients it was hard to get them to try other types of gems.
This striping tape is super easy to use and is error-proof. You literally can’t mess up putting this stuff on your nails and you can do so many different designs with this tape its amazing.
When you come across pictures on Instagram or Pinterest and you see perfectly lined nail art odds are they used this striping tape to make the design.
Since it is so thin you can use the tape to make precise tiny lines or put lines next to each other to make bigger looking ones.
This striping tape has a sticky bottom so you don’t need to put anything down before you use it. Just rip the tape, place it on top of the nail, and cut the ends. For normal polish you can just use a normal topcoat and be good to go!
I would leave the tape attached to the roll, pull out a long piece and then lay it down on the nail. Once the tape is laid down on the nail then I would cut the tape. This is just my personal preference. It is easier to lay on the nail and then cut it around the nails vs. trying to measure out a tiny piece and put it on that way. The longer tape is easier to work with than a shorter piece.
Pros
- Super easy to use
- The tape is sticky on the bottom so you don’t need to worry about putting down any type of additional adhesive, just stick directly on top of dried color polish
- The adhesive is super sticky
- Least bulky nail art option
- Doesn’t require extra product or tools just base coat, color, and topcoat
- Looks clean
- Minimalist option
- Can make your own pattern and geometric designs
- Can put down multiple pieces and layer over one another
Cons
- None
Nail Inspo With This Pack


Summer Shapes

You may find some of the same shapes in this pack as above but the majority of these are going to be great for spring and summer!
This entire pack is gold for all the shapes which makes them more ideal for those who want a single uniform look.
Each shape comes in its own divider spot and you just simply turn the top the section of the shape you want to use.
Pros
- All gold color
- Different size shapes
- Same shape in different size ex small, medium and large circle
- Six different cases/dividers
Cons
- Patient application to have it stay exactly where you want
Nail Inspo With This Pack


If you’re a fan of gold, check out this guide I wrote on the best Kendra Scott alternatives.